By enabling the Lead Generation feature, your Vardast becomes an efficient bridge between you and your users. It allows the Assistant to intelligently capture contact information during natural conversations—whether for follow-ups, inquiries, or support—delivering that data to you in real-time.
Step 1: Activating the Lead Generation Function
- Log in to your dashboard and navigate to the Assistants section.
- Select the specific Assistant you wish to configure and click on the AI Behavior tab.
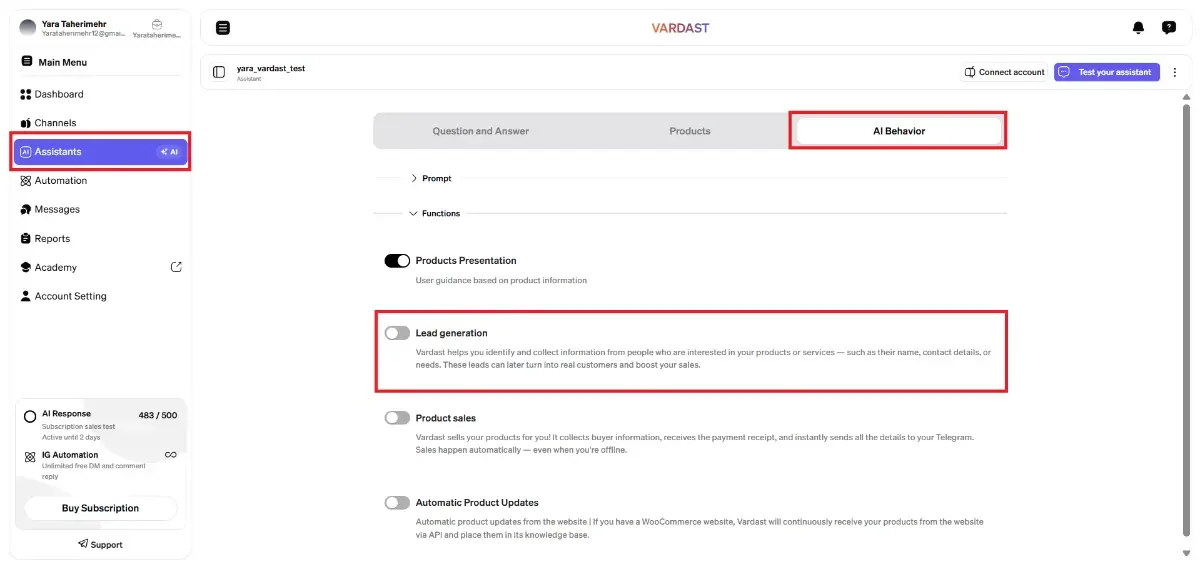
- In the Functions section, locate and toggle on Lead Generation.
- Once enabled, a new configuration panel will appear within the Prompt section.
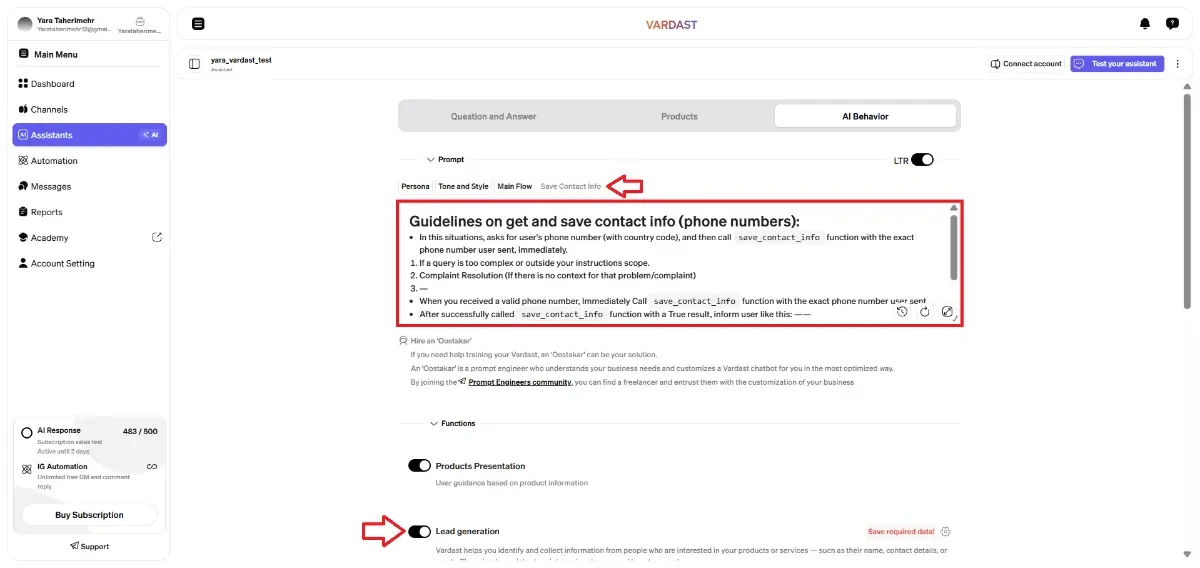
Step 2: Configuring Triggers and Custom Messaging
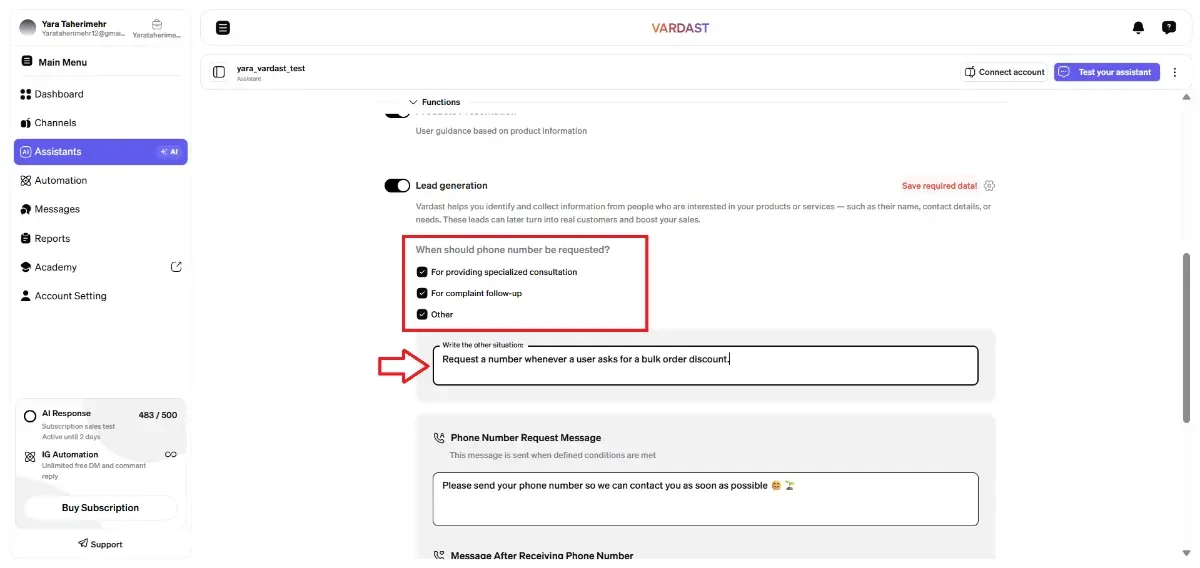
In the configuration panel (the section that opens after activation), you can define exactly when and how the Assistant should request a user's phone number.
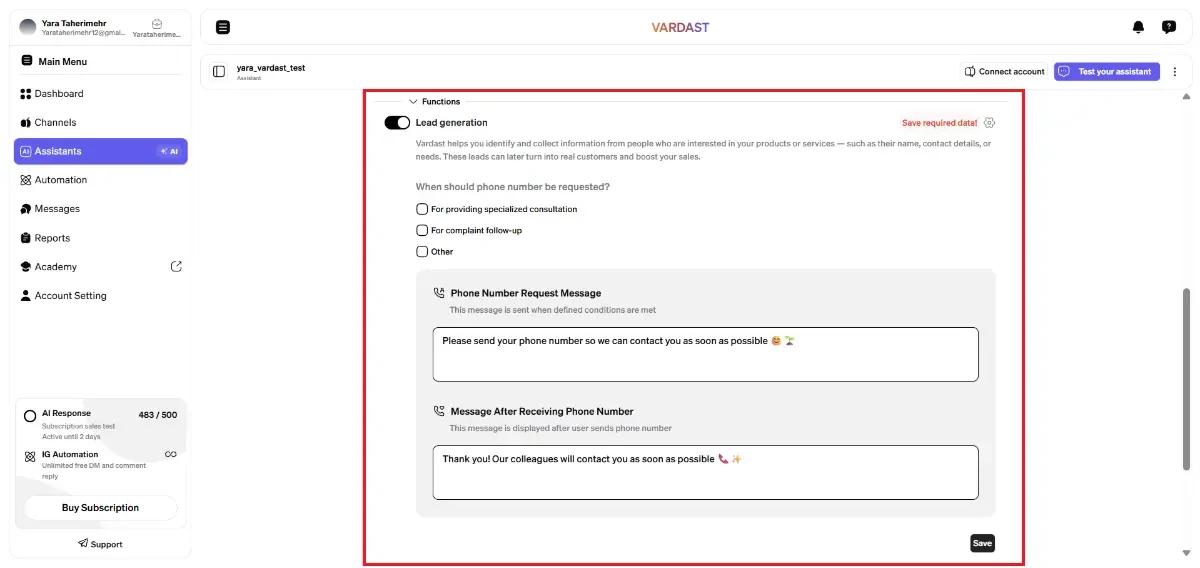
Define Your Triggers
Choose from pre-set scenarios or create your own:
- Specialized Consultation: Ideal for high-intent users needing expert advice.
- Complaint Follow-up: Ensures your support team can reach out to resolve issues.
- Other (Custom): Enable this to define a unique scenario.
- Example: "Request a number whenever a user asks for a bulk order discount."
Customize the Interaction
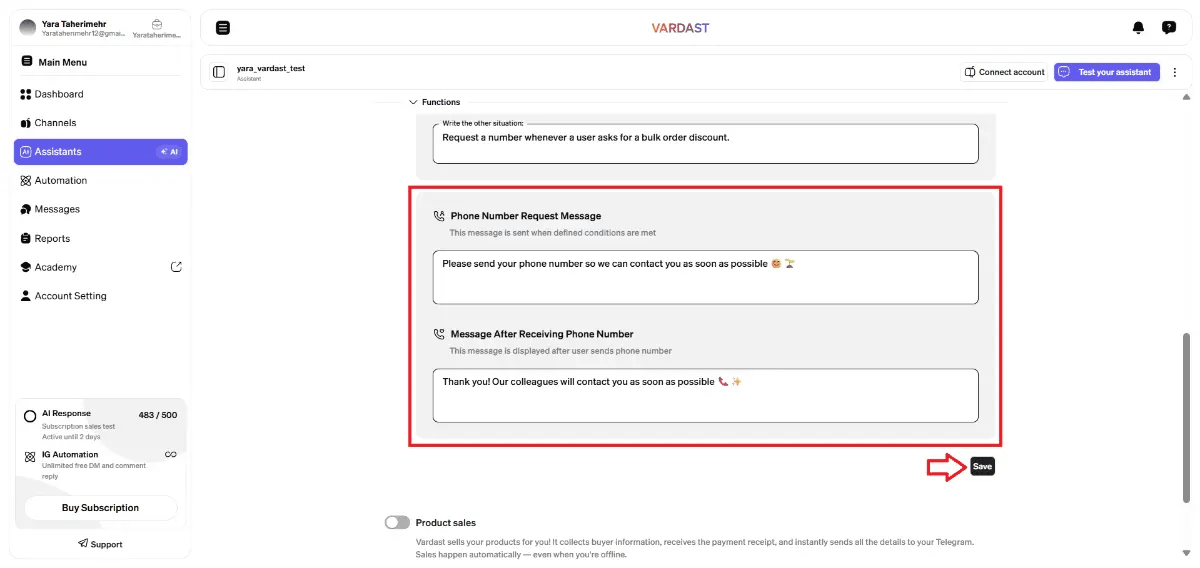
You can tailor the dialogue to match your brand voice:
- Request Message: This is what the Assistant says to ask for the number. (e.g., "Please send your phone number so we can contact you as soon as possible 😊🌱")
- Confirmation Message: This is the notification the user sees once they provide their number. (e.g., "Thank you! Our colleagues will contact you as soon as possible 📞✨")
Note: Don't forget to click Save to activate these settings.
Step 3: Managing and Exporting Collected Leads
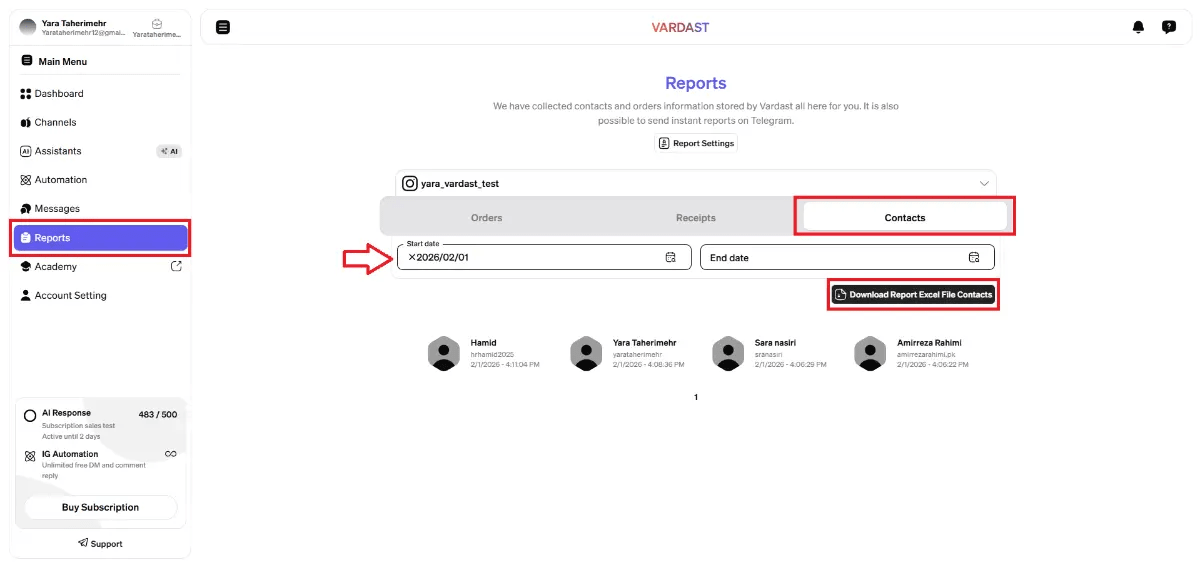
All captured data is organized within your dashboard for easy follow-up.
- Navigate to the Reports section and select the Contacts tab.
- Select the correct Channel to view leads from a specific source.
- Use the Date Picker to filter reports by your desired timeframe.
- To process data offline, click the Export button to download your lead list as an Excel file.
Step 4: Real-Time Notifications via Telegram
To receive leads the moment they are captured, integrate your Telegram group.
- Create a Telegram Group and add the bot @vardast_management_bot.
- In the Group Settings, enable the Topics feature.
- Create a new Topic (e.g., "New Leads") and send a test message inside it to initialize the connection.
- Copy the Link to that specific Topic.
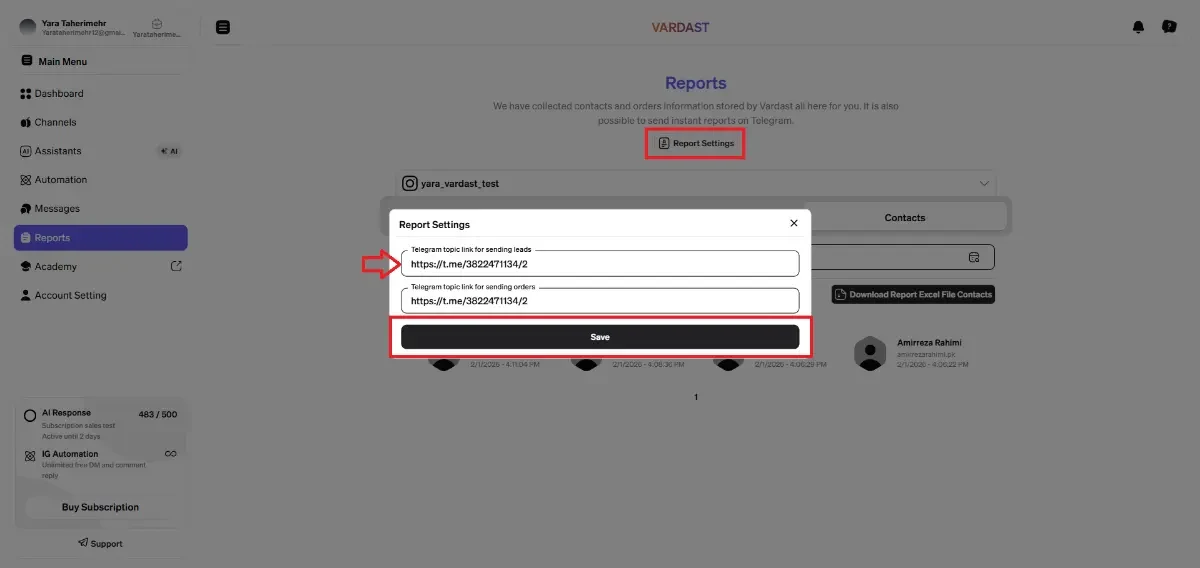
- Finalize the Connection: * Go to Report Settings and paste the link in the "Telegram Topic Link for Sending Leads" field.
- Alternatively: Go to the Channel section, enter Channel Settings, and paste the link there.
Click Save. All leads will now be instantly pushed to your Telegram group.